While working on my current art installation “Shelter”, I managed to solve some technical and mathematical challenges that I want to write about today.
In this work, you will find a spherical mirror in the center of the room, in a way representing the fragile soul of the work. By projecting onto that mirror, I can use 360° of the space around the sphere as a projection surface, including the floor. Recently, some research has been carried out on dome projection using a single projector. Paul Bourke’s website http://paulbourke.net/ is especially interesting in this regard and surely worth a read, even if you are completely new to this topic.
Spheriod?
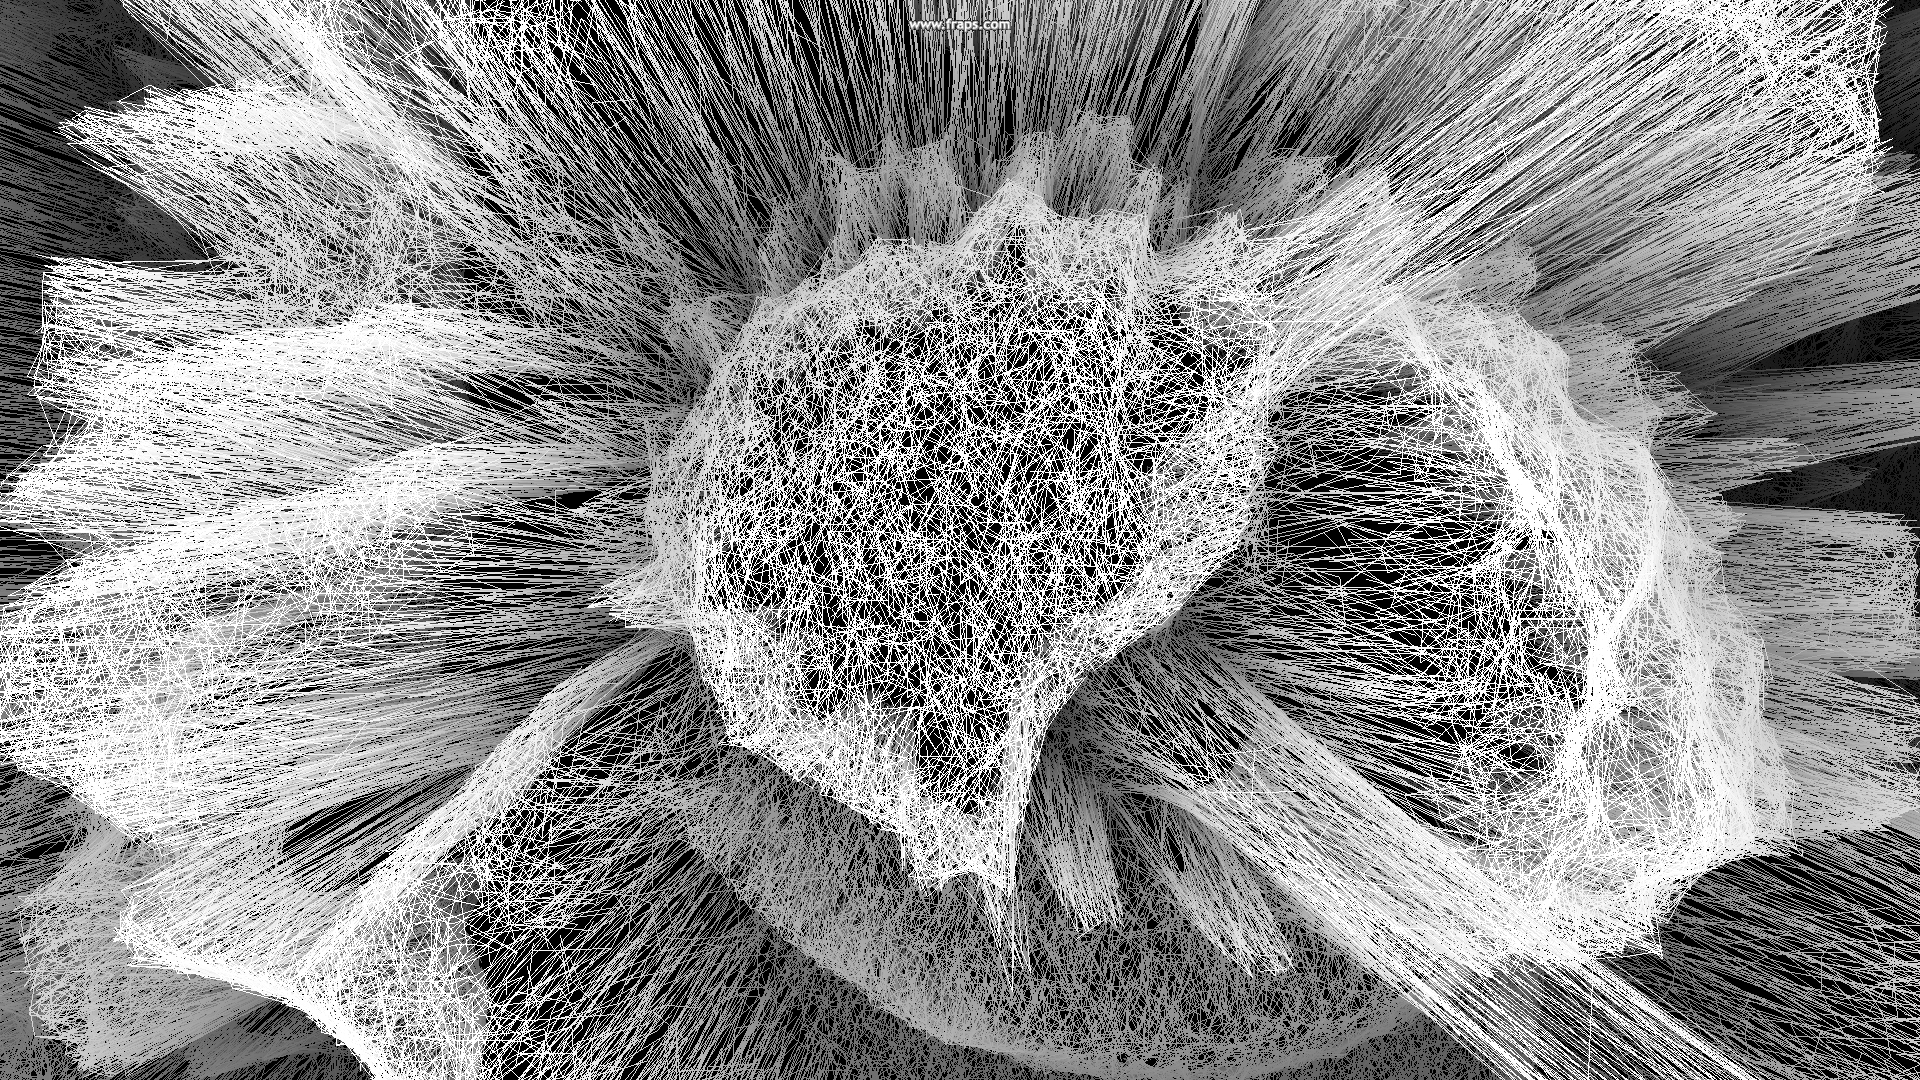
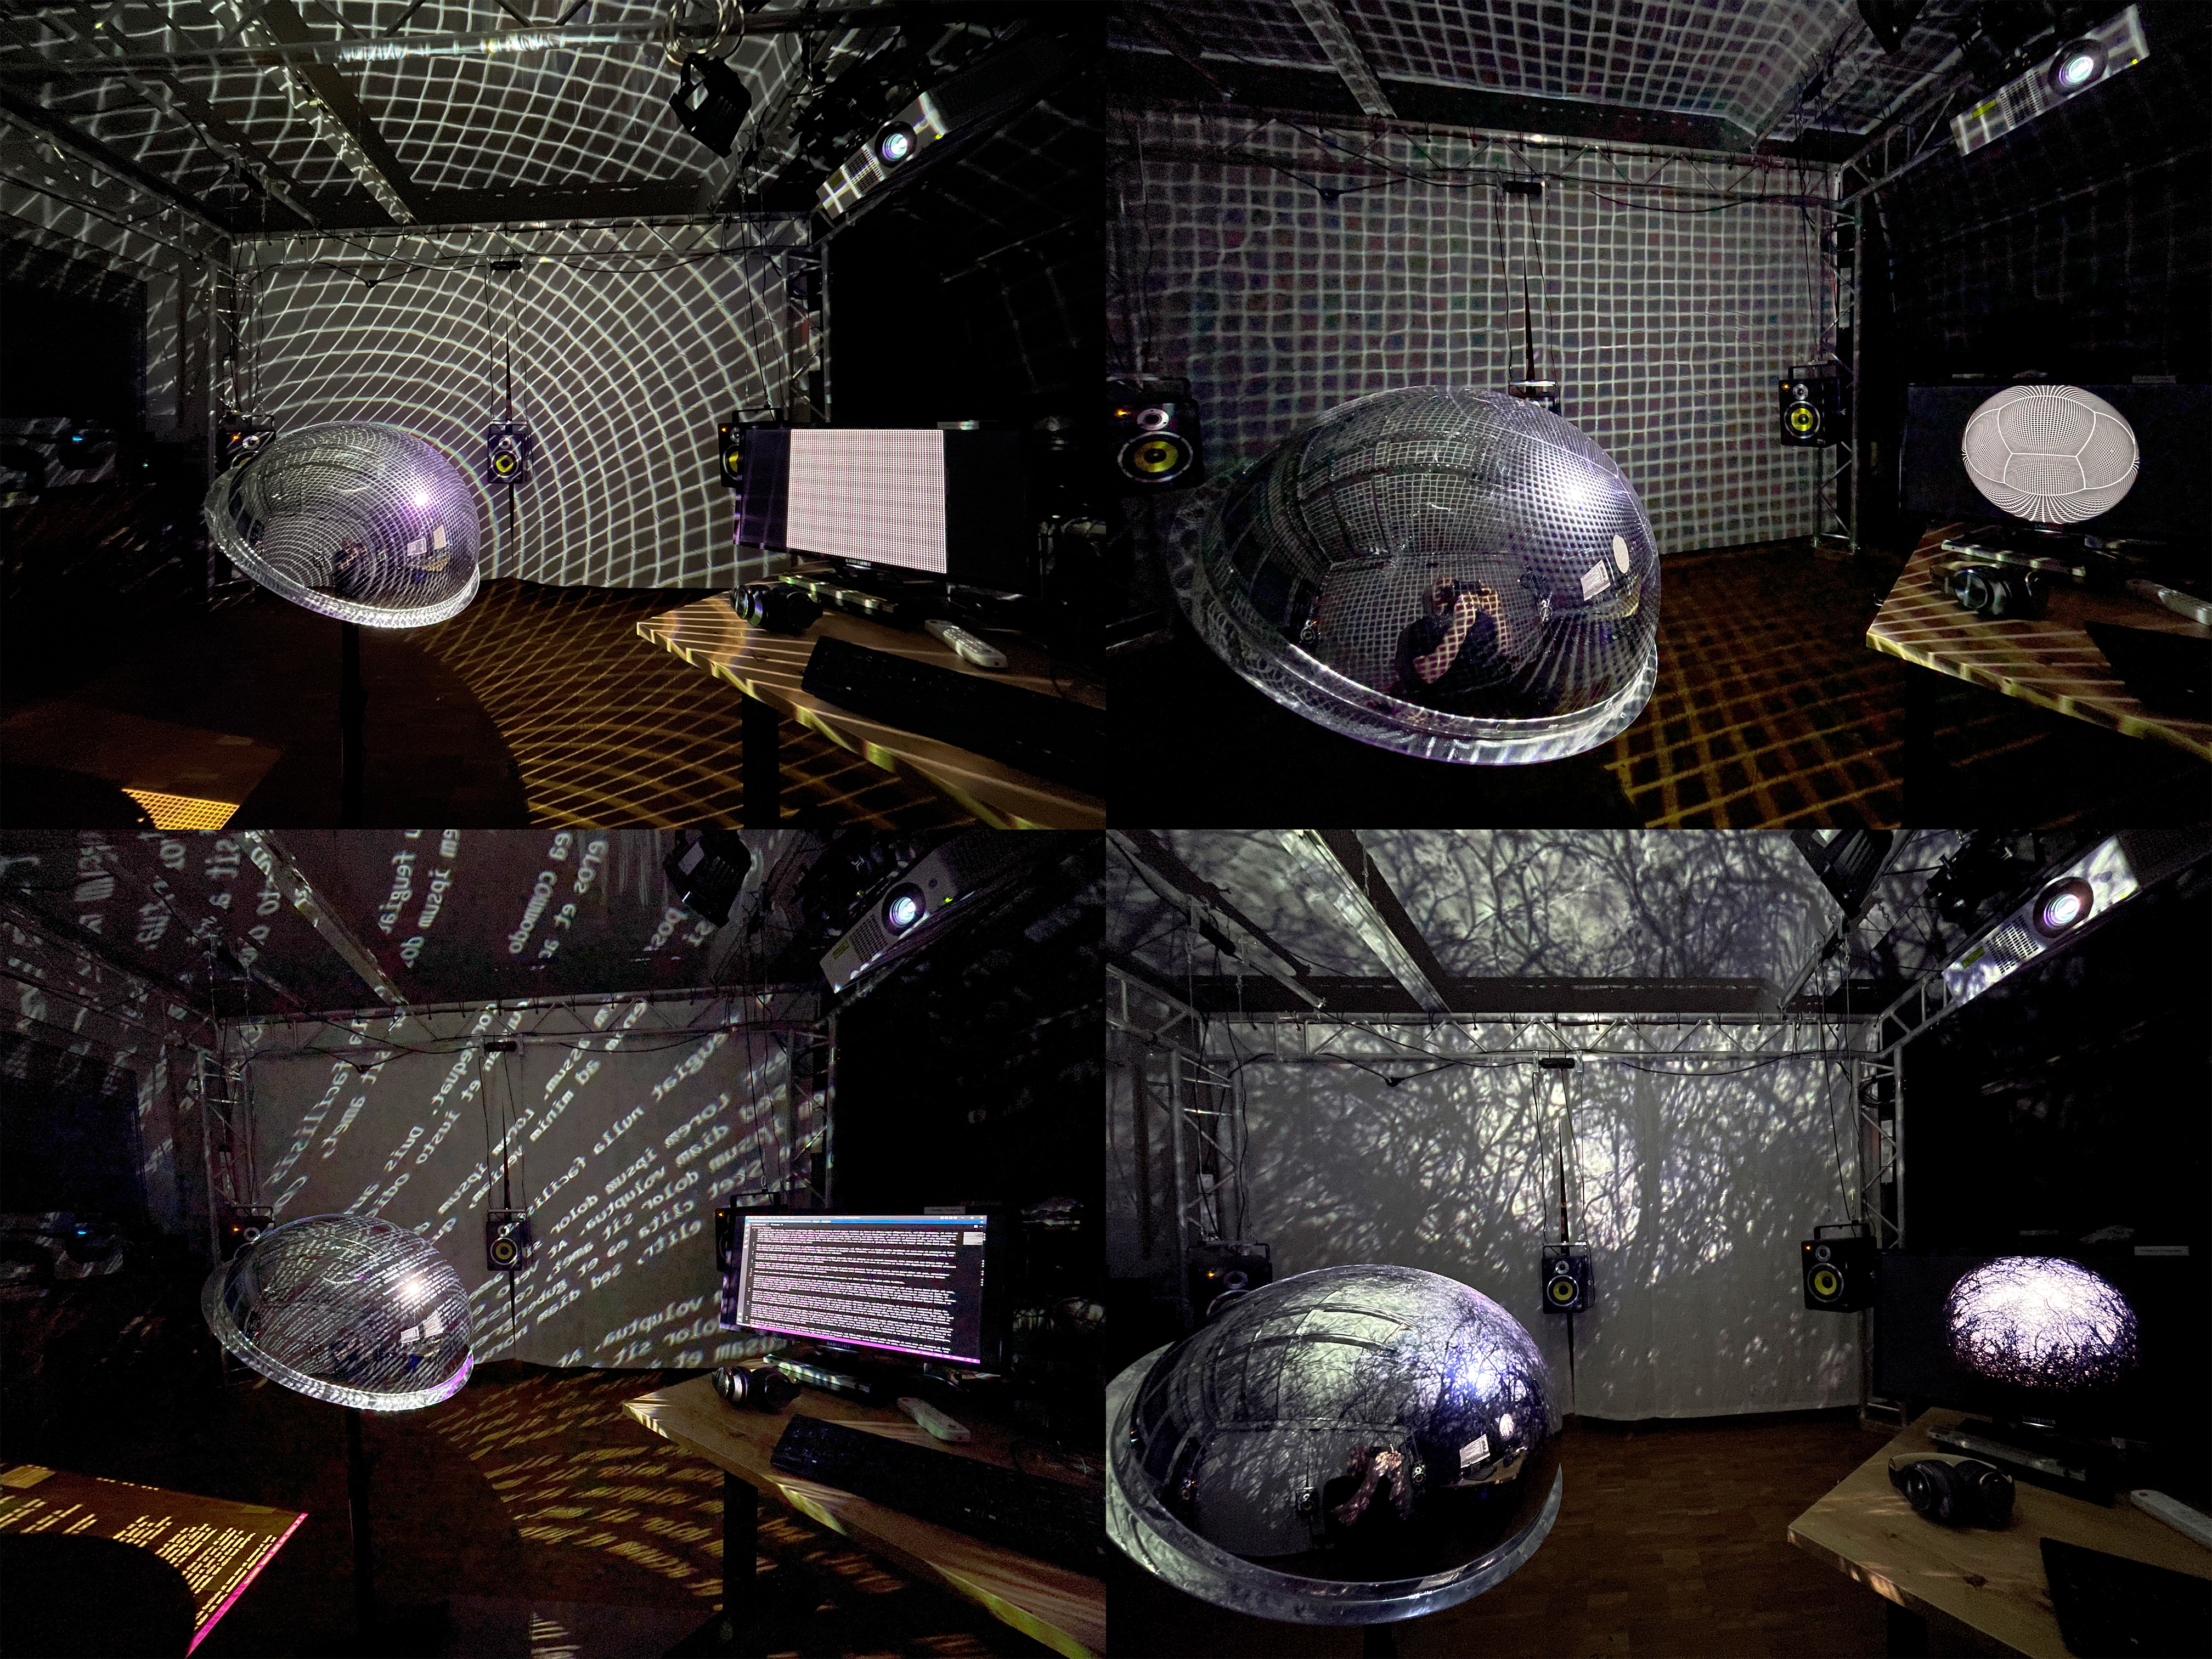
The main problem – that I was able to solve in the end – was the following: all mirrors currently available to me are not spheres or semi-spheres but industry mirrors that are flattened in depth. Mathematically they most closely resemble ellipsoids. If I project a plain grid or text onto such an ellipsoid, of course the result is a strongly distorted image (please see top left and bottom left of the following test setup images).
To be able to project a rectified grid, I had to determine which part of the wall I am going to see when looking through the mirror from the projector standpoint. And vice versa: given a point on the wall, which part of the reflected projector image will it receive? So the center question is: If I have a projector with certain parameters and a certain 3D position on a wall, where on a rotated and shifted ellipsoid will the reflection happen that leads to the image? Sadly, there seems to be no simple, closed solution to this problem.
Help comes in form of Fermat’s principle (light travels by the shortest route) and using the first and the second derivative of an aligned ellipsoid in two dimensions to minimize the length of the light path from the projector via the mirror to the wall point. So yes, the problem can be tackled iteratively as an optimization problem, using several hundred minimization steps per given point pair. This way, I can now correct the distortion and project onto an arbitrarily positioned and rotated ‘egg’ in the room in a way that the projection onto walls, ceiling and floor looks straight (top right in the above image).
In the end, I do not want to display a wall, but require to simulate what an observer would see in a thicket of a forest through the wall if that observer had an average body height of 1.7m. So in addition I have to solve the problem that the mirror is not placed at that height and perform a shift of perspective. You can find the current state of my research in the lower right picture.
By the way, the projector is in the upper right corner of every small image and the monitor on the right of the images shows which content was actually projected.
Calibration
In the meantime I have developed a calibration procedure so you do not need to set all parameters of the mirror (form, position, rotation) and projector (position, direction, field-of-view, lens shift) manually. Instead, I use 2D calibration points, where every calibration point on the screen (left image) corresponds to a 3D point in the room (right image).
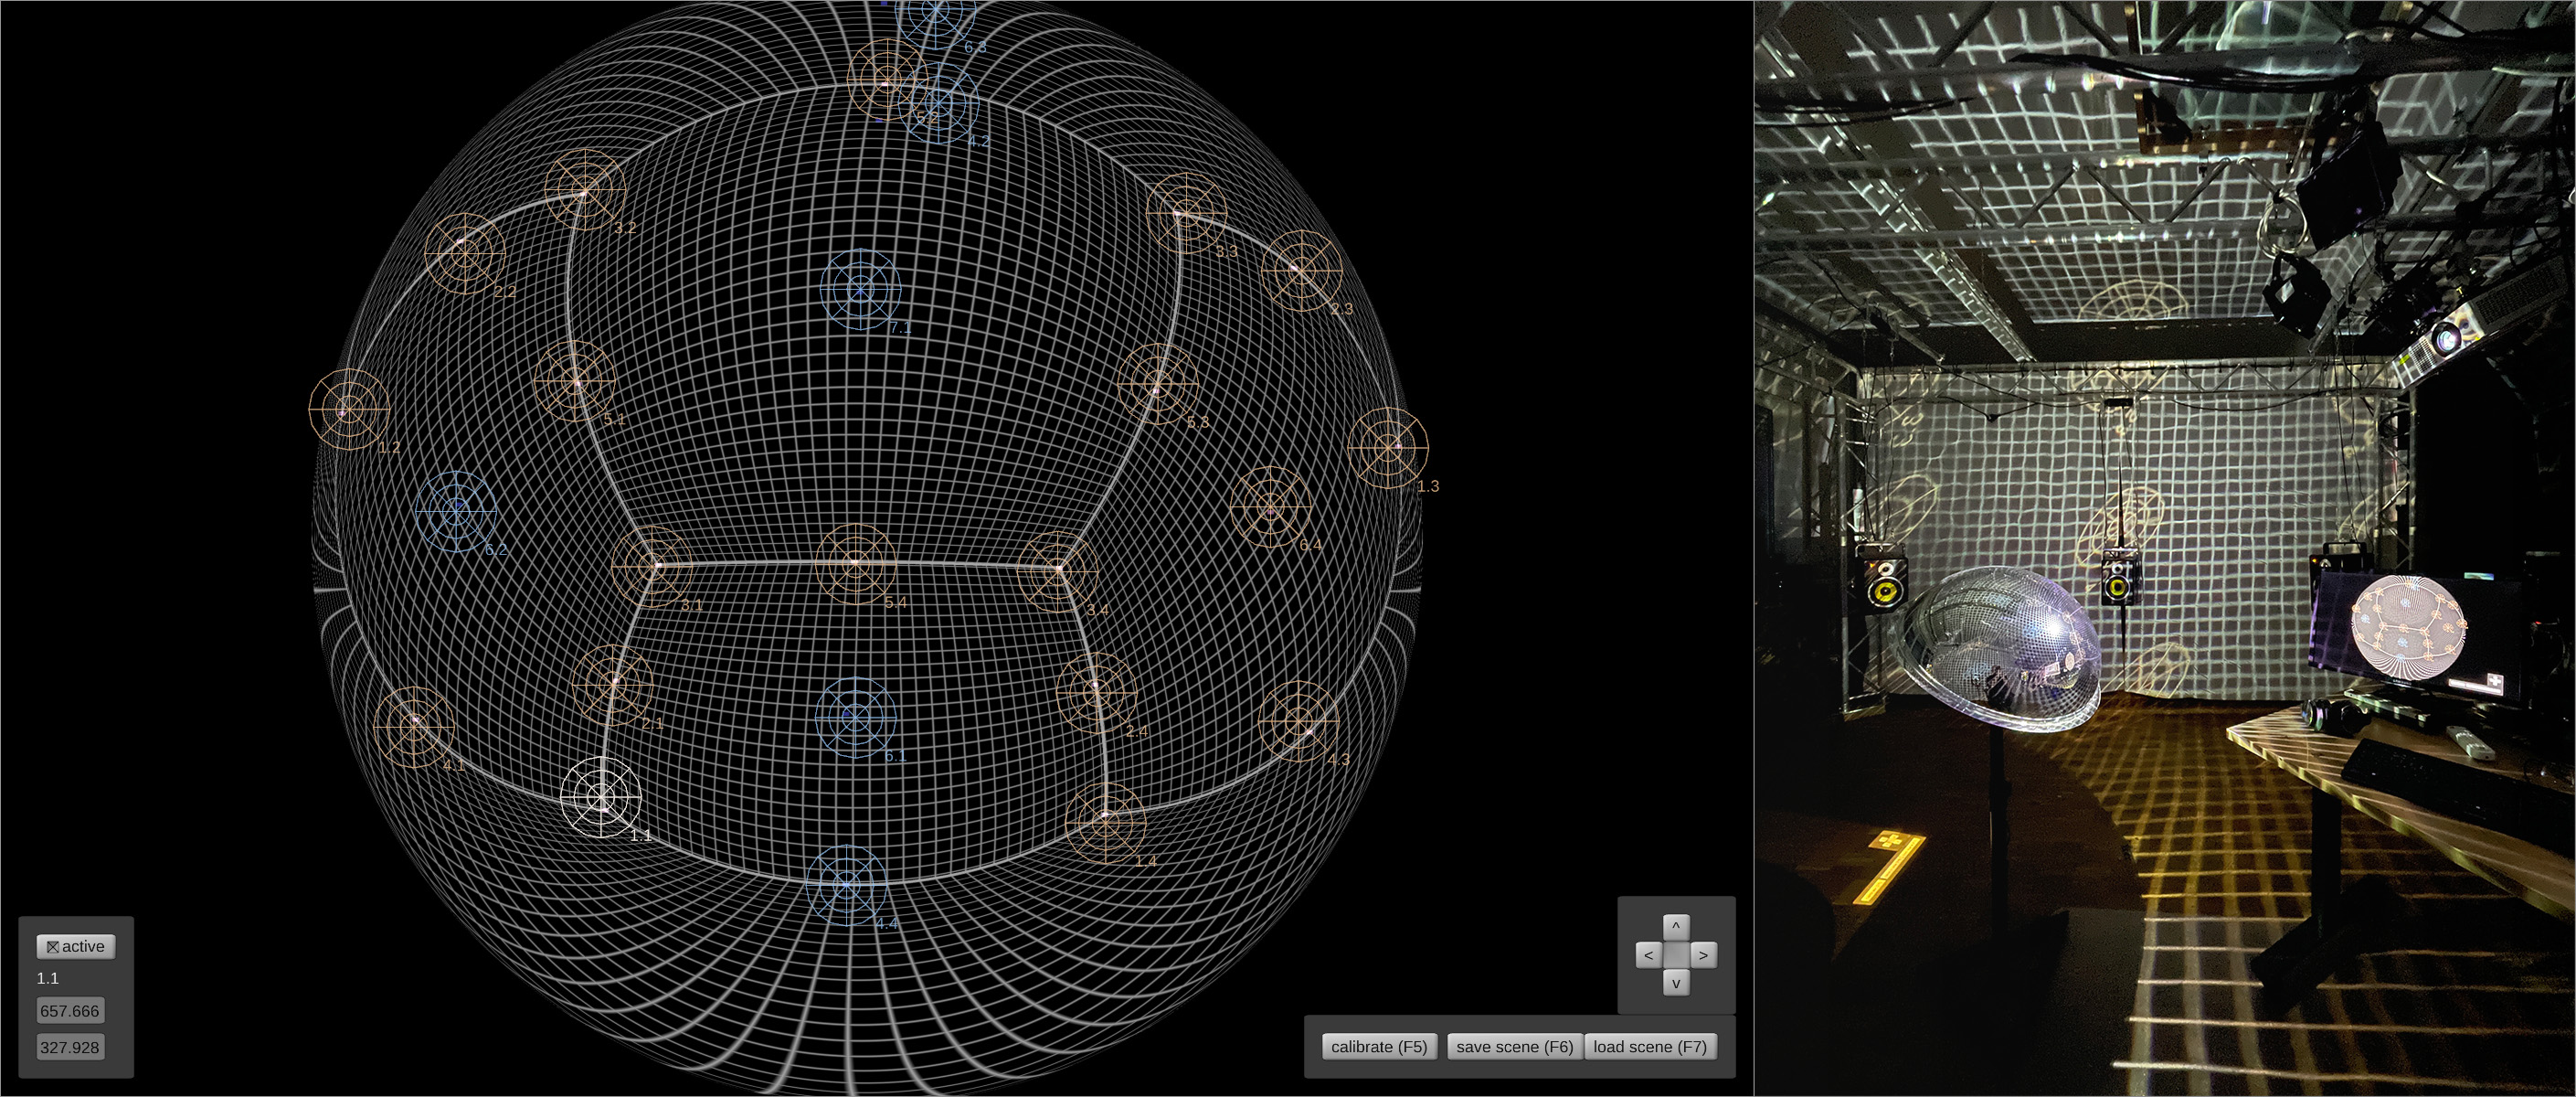
By moving the calibration points in the 2D image with a mouse or keyboard to their respective projection positions in the room, the geometric parameters of mirror and projector can be estimated by machine learning automatically. Note that the projection may not be perfect due to imperfections of the mirror and geometric discrepancies of internal and real model (mainly the industrial mirror and the room itself). The determined parameters try to minimize the error of that match. The more points you are able to set, the better the result is going to be.
Interactivity
The visitors of the installation shall be able to interact with the projected plants using their shadows. I placed an astronomy camera behind a filter wheel right next to the projector to achieve this (see image below).
The camera is quite sensitive and the exposure as well as the gain can be adjusted nicely by software. The motor-driven filter wheel is equipped with a glass filter that lets through all visible light and an infrared filter that blocks visible light but lets infrared wavelengths through. For calibration I switch to the visible spectrum, for interactivity to the infrared. This way there is no feedback of the projected image into the interaction camera when the work is on display. The scene has to be lit by infrared light of course.
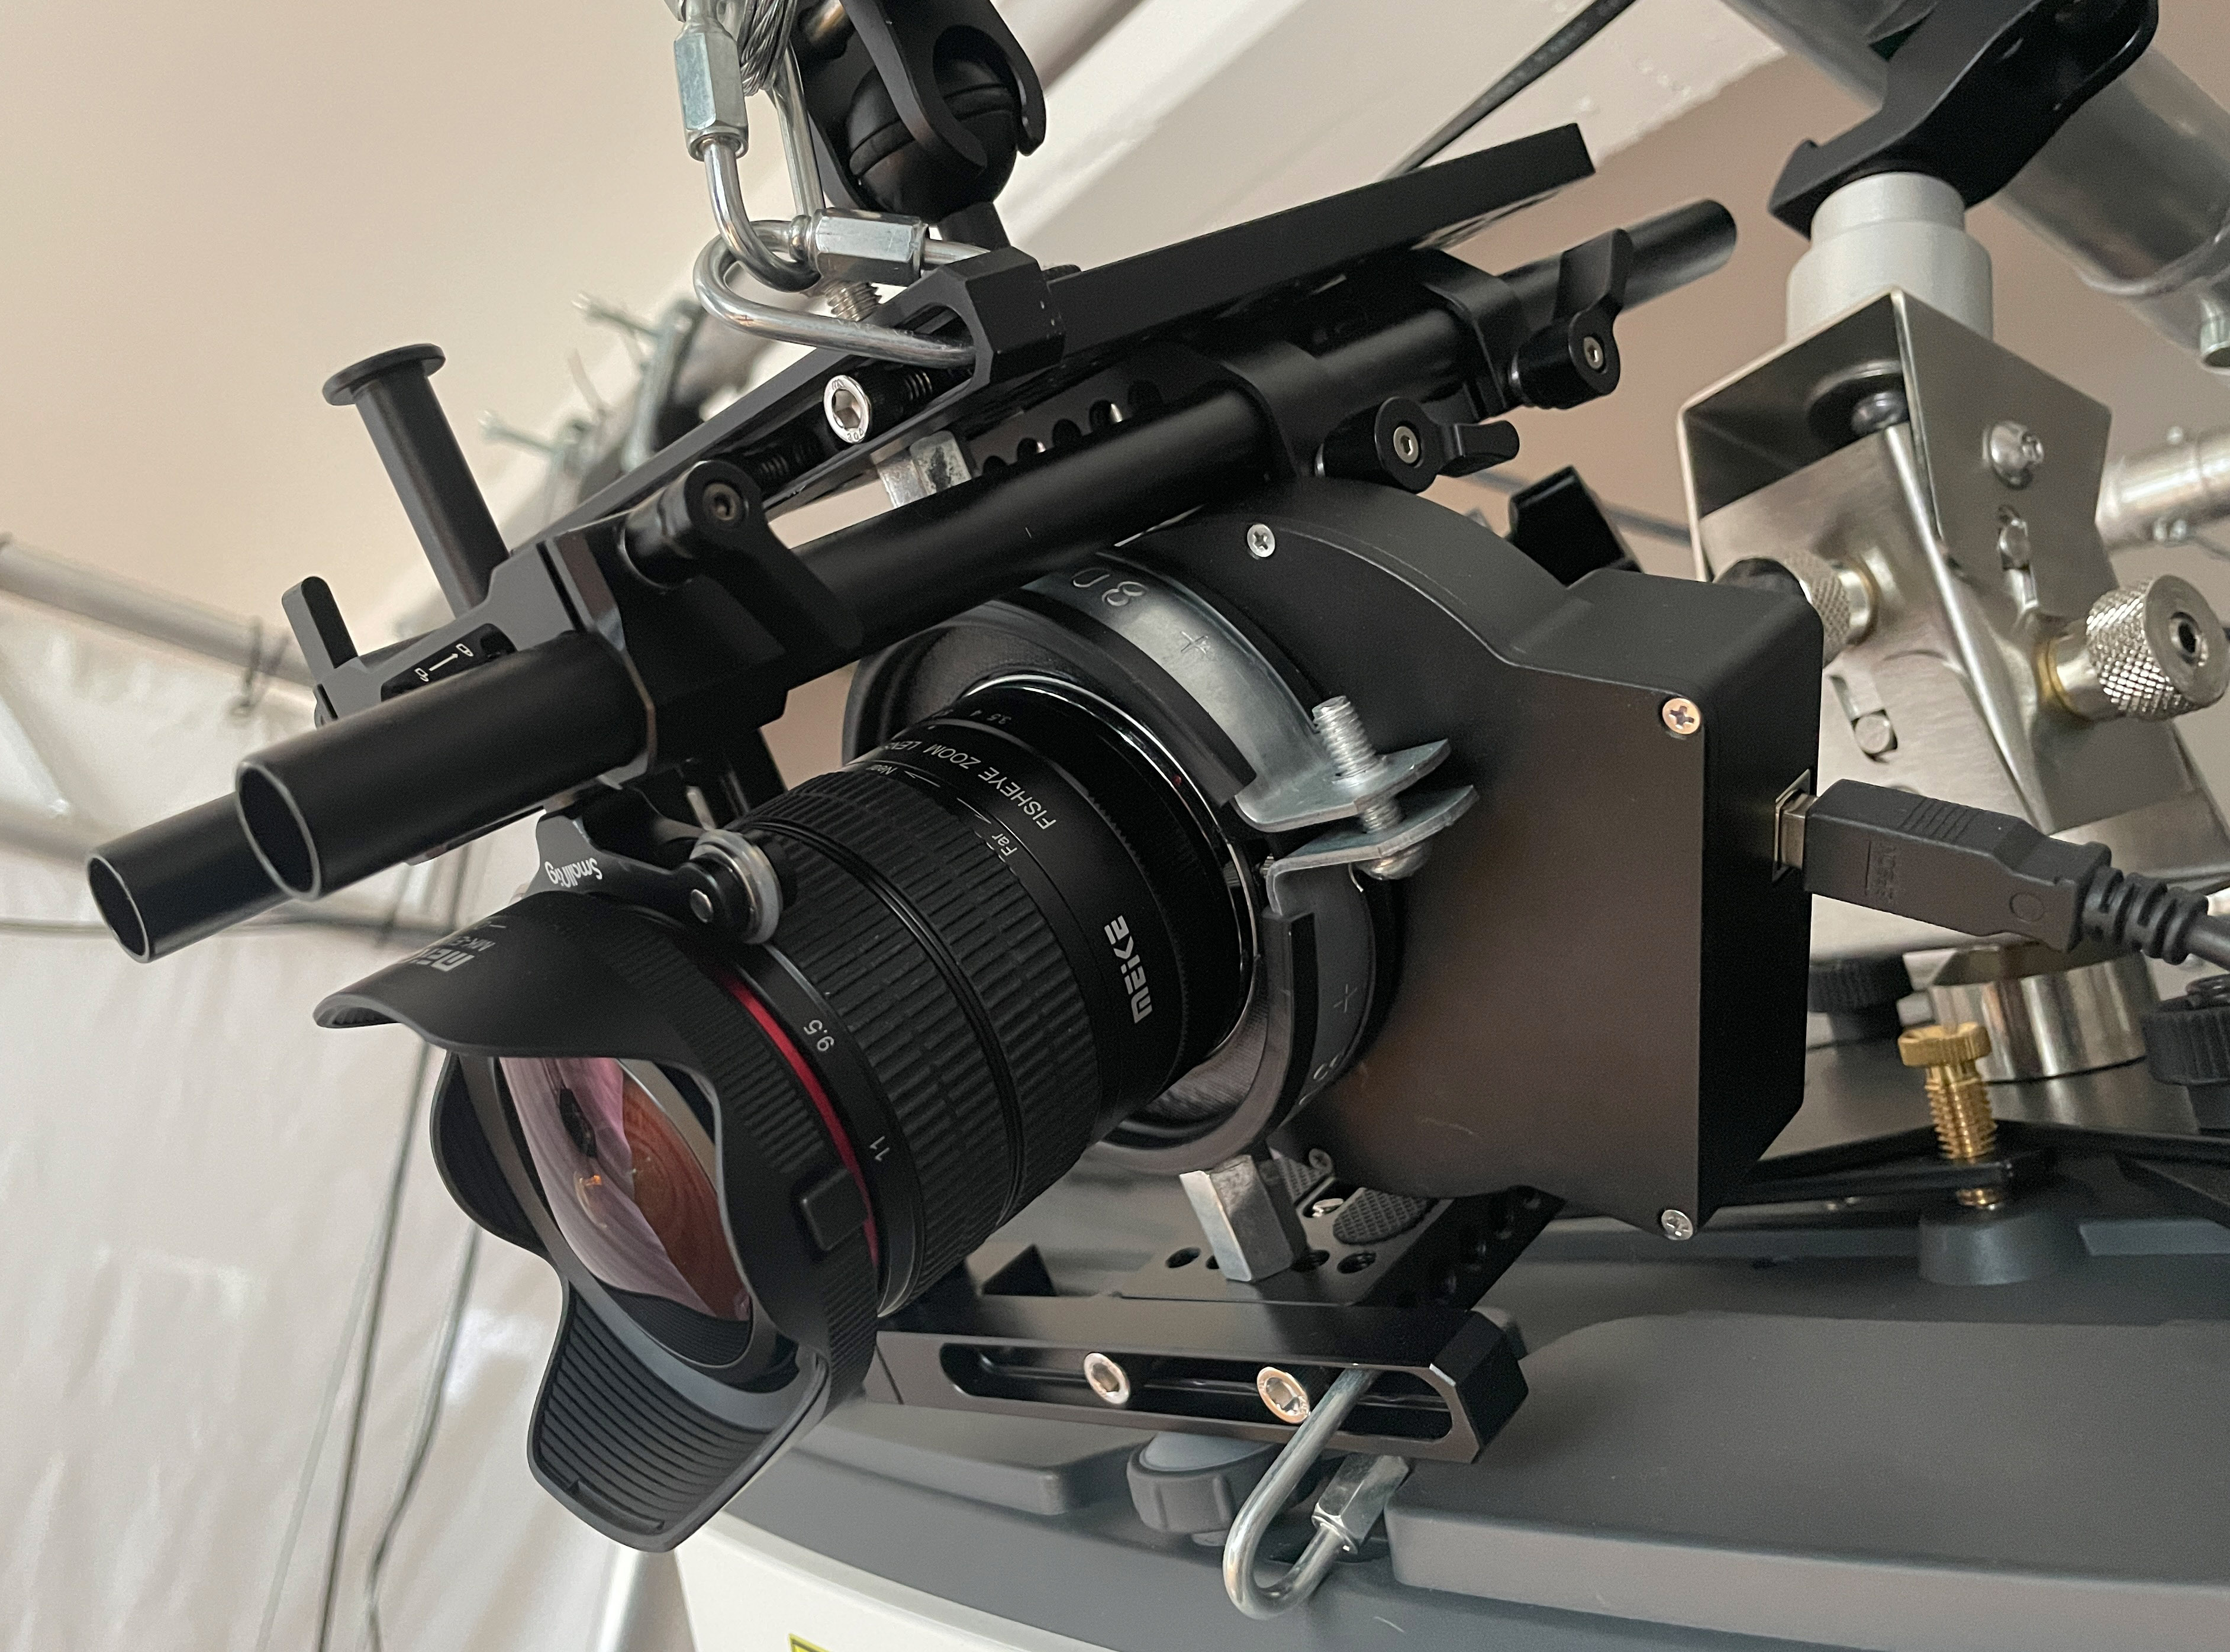
Physical attachment of the camera cage to the lens, the filter wheel and camera body are achieved by 3D printed adapter rings and a modified hose clamp. The custom 3D printed adapters were necessary since the Canon EF lens I am using is not meant for astronomy purposes and no adapters currently exist for this scenario.
To calibrate the interaction camera, I am going to implement a fully automated procedure. Since the projector and mirror parameters as well as the wall positions are known from the above calculations, I can use arbitrarily projected points onto the walls to perform the calibration. The only thing to make sure is that I can distinguish between three types of points: a) direct illumination of the scene, b) points that light up on the mirror surface due to dust etc. and c) points that actually appear in the mirror. Here I am in general only interested in case c) but may opt to use the other cases for further clarification of the geometry.
Outlook
If small projectors keep on getting brighter, we will see computer automatic virtual environments (CAVEs) more often, either by the use of fish-eye lenses or a combination of a projector and a spherical mirror, as they are present in some ultra short throw projector models already. In combination with cameras that film and categorize the 3D environment, this may well lead to immersive and interactive environments at home that can calibrate themselves on the fly, no matter where the projector is placed in the beginning. And I hope we will see many more artworks using these techniques in the near future.
Please have a look the artwork page if you are interested in more details on the work “Shelter”.